
Learning how to drape a saree can feel tricky at first. The pleats, the pallu, the pins. It all seems like a lot. Many beginners feel nervous at first. But saree draping gets easier with practice.
This guide breaks saree draping into simple steps. We stick to the basic method. No fancy styles, just the essentials. Read it once before you start. It will make more sense with the saree in hand.
What You Need Before You Start
Before you begin, get everything ready. This saves time and stress later. A little prep makes draping smoother. You will feel more confident too.
Basics to keep ready:
- Safety pins and saree pins, keep extras
- A blouse that fits you well
- Underskirt or shapewear, snug at waist
Footwear: Wear your footwear before draping starts. It changes how the length falls. Heels suit a formal look best. Flats or wedges work for comfort.
Choosing an Easy Fabric for Your First Try
Some saree fabrics behave better than others. Picking the right one helps a lot. It can change your whole experience. Beginners should start with something simple. Cotton is the best choice here. It holds the pleats without much slipping. It also forgives small mistakes. Silk works well once you improve. It holds shape and falls nicely.
Fabrics like chiffon and georgette slip easily. Net and organza are tricky too. These fabrics move a lot, even with a light touch, so they need steadier, practiced hands. Save these for later attempts. Try them once the basics feel comfortable.
Step 1: The Initial Wrap

This is where saree draping begins. Start by tucking in the saree. Begin near your belly button area. Wrap the saree around your waist. Move the fabric right to left. Go all the way around once. Keep the motion smooth and steady.
Check that the length stays even. It should sit just above ground. Not dragging, and not too short. This sets up the rest well.
Step 2: Making the Pleats


Now comes the pleating stage, a key part of the saree drape. Make five to seven pleats total. Keep each pleat about equal width. Around five inches works well here. Even pleats create a neat look.
Once pleats are lined up evenly, tuck them in at the waist. Face the pleats toward your left. Press them gently to hold shape. This finishes the pleating step.
Step 3: Setting Up the Pallu
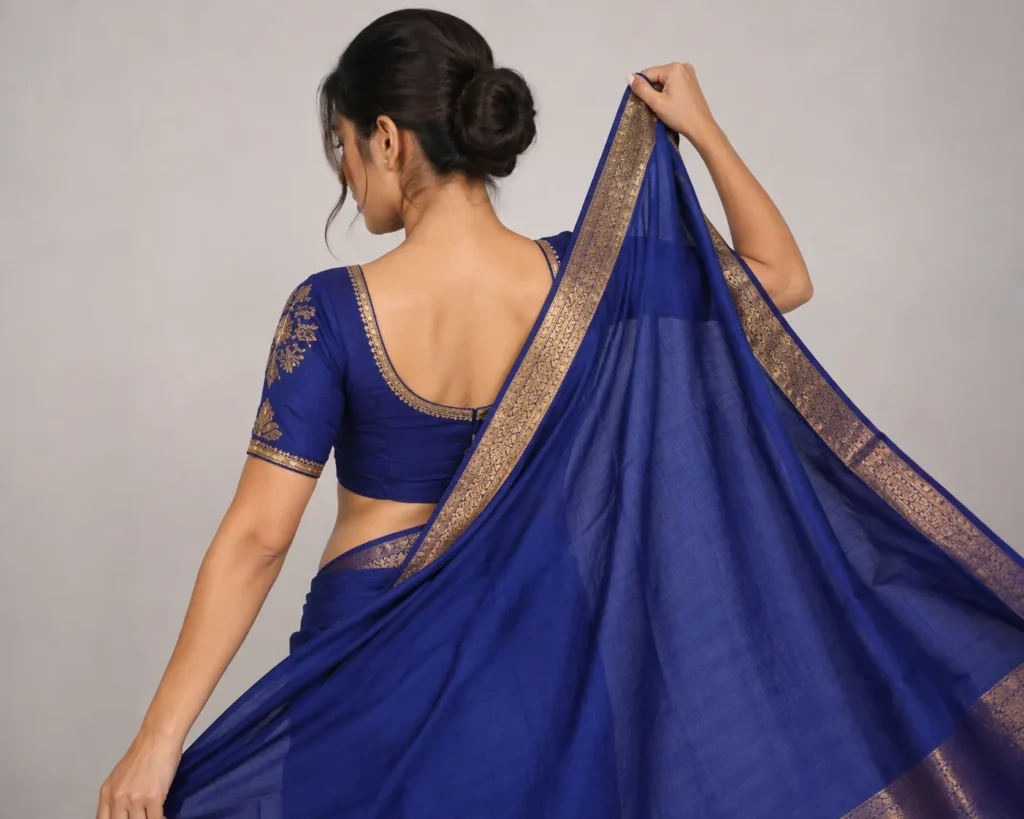

The pallu sits over your shoulder. It is a very visible part of the drape. Measure about ninety centimeters of fabric. This length works for the pallu. Bring it over your left shoulder. Use one smooth, steady motion.
Let the pallu fall down naturally. It should reach below your knees. Adjust it until it looks balanced. This completes the pallu setup.
Step 4: Final Touches

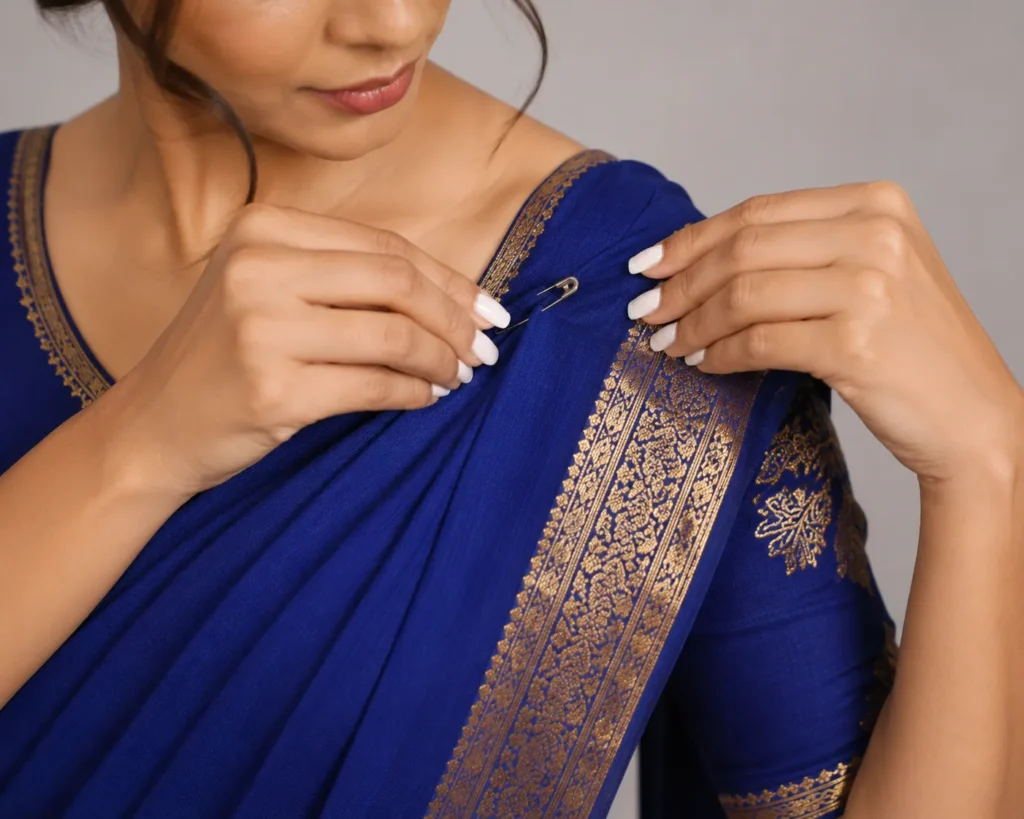
You are almost finished now. Pin the pallu at your shoulder. This stops it from slipping loose. Use clips at the waist and pleats, choosing sturdy ones that hold well without damaging the fabric.
Adjust the front near your midriff. Keep the slant even and balanced. Avoid any twisted or uneven look. Your saree drape is now complete.
Tips for First-Time Drapers
A few small habits help. Practice in front of a mirror. This helps you spot small errors. Fix them early, before it counts.
Iron your saree before draping it. Clean fabric folds much better. Stay relaxed and take your time.
Give yourself a fixed time to practice, away from any rush. Try draping on a weekend morning, when there is no pressure of an event. Repeating the same steps a few times helps your hands remember the motion.
Final Thoughts
Draping a saree does not need to overwhelm you. Break it down into small steps. Focus on wrapping, pleats, and pallu. These three parts matter most. Give yourself time to practice this. Soon you will drape a saree with confidence.